Windows 10 adalah salah satu versi Windows yang paling dinantikan oleh Microsoft. Walaupun, Windows 8 mencipta tren baru dalam dunia OS Desktop, ia mempunyai beberapa masalah dalam reka bentuk dan prestasi yang menjadi fokus utama untuk Microsoft pada Windows 10. Oleh itu, Windows 10 Final Build diturunkan pada 29 Julai 2015, untuk Desktop sebagai dan juga Telefon Pintar.
Ini termasuk banyak pengubahsuaian dengan mempertimbangkan kekurangan Windows 8. Sebenarnya, ia adalah versi Windows yang maju tetapi masih ada beberapa akibat yang berlaku setiap hari dengan pengguna yang berbeza.
Sebahagian besar dari akibat ini adalah kesalahan yang muncul ketika berusaha melakukan tugas tertentu. Sebilangan orang telah menerima mesej ralat ketika cuba membuka perisian dan penyemak imbas yang berbeza di dalam Windows 10. Kesalahan ini disertakan dengan mesej ralat yang mengatakan Aplikasi tidak dapat dimulakan dengan betul (0xc0000005). Klik OK untuk menutup aplikasi . Kesalahan ini biasanya berlaku pada penyemak imbas internet tetapi tidak terhad kepada ini. Sebarang aplikasi di dalam Windows boleh berhenti bertindak balas kerana kesalahan ini. Oleh itu, ia perlu diperbaiki untuk mengembalikan semula perisian penting tersebut.

11/12/2016: Pengguna melaporkan bahawa kaedah yang disenaraikan di bawah juga akan berfungsi pada Windows 7.
Sebab Di Sebalik Ralat Windows 10 0xc0000005:
Terdapat beberapa sebab yang diketahui menyebabkan kesalahan ini mengganggu operasi pelbagai perisian di Windows 10. Salah satu sebab yang dianggap sebagai penyebab utama adalah program antivirus pihak ketiga yang menyebabkan konflik dengan fail yang dapat dilaksanakan dan mempengaruhi operasinya. Sebaliknya, pendaftar boleh rosak kerana perisian hasad dan virus yang menyebabkan program tersebut tidak normal. Kadang kala, pemacu perkakasan yang buruk juga boleh menjadi penyebab kesalahan ini.
Penyelesaian untuk Memperbaiki Ralat Windows 10 0xc0000005:
Berdasarkan sebab-sebab yang disebutkan di atas, penyelesaiannya adalah langsung. Oleh itu, ikuti kaedah berikut untuk menyingkirkan mesej ralat yang mengecewakan ini.
Membaiki Fail Sistem yang rosak
Muat turun dan jalankan Restoro untuk mengimbas dan memulihkan fail yang rosak dan hilang dari sini , setelah selesai, teruskan dengan penyelesaian di bawah. Penting untuk memastikan bahawa semua fail sistem tetap utuh dan tidak rosak sebelum meneruskan penyelesaian di bawah.
Kaedah # 1: Memperbaiki Program Antivirus
Program antivirus dapat mempengaruhi file yang dapat dilaksanakan dari sejumlah program. Oleh itu, untuk menyelesaikan masalah ini, anda diminta untuk mematikan program antivirus pihak ketiga untuk memeriksa sama ada ia adalah pelakunya atau tidak. Harap maklum bahawa mematikan program antivirus boleh mengakibatkan beberapa ancaman serius terhadap komputer anda ketika disambungkan ke internet.
Anda juga boleh menggunakan perisian keselamatan Windows iaitu Windows Defender . Ia mempunyai fungsi yang sama seperti antivirus lain. Anda boleh mematikan antivirus dengan menavigasi ke Tetapannya dan mematikan perisai.

Setelah dilumpuhkan, periksa ralat sekali lagi. Sekiranya, ia masih berterusan, beralih ke kaedah seterusnya.
Kaedah # 2: Memperbaiki Pendaftaran
The pendaftaran adalah pangkalan data pusat Windows yang sentiasa digunakan oleh PC anda untuk membantu ia membaca banyak fail & tetapan yang berbeza yang diperlukan untuk menjalankan. Pendaftaran boleh rosak kerana kerosakan pada beberapa fail tertentu yang diperlukan untuk meletakkan semuanya di tempatnya. Oleh itu, kebanyakan pakar mengesyorkan agar anda memastikan untuk membuat sandaran Pendaftaran anda dan menyimpan sandaran ini pada stik USB konvensional sehingga anda mungkin dapat menghidupkan kembali Pendaftaran anda dalam keadaan sebelumnya sekiranya berlaku kerosakan. Tetapi, jika anda tidak membuat sandaran Pendaftaran anda, ikuti langkah-langkah ini untuk memperbaiki pendaftar untuk menyelesaikan ralat 0xc0000005 .
1. Muat turun perisian pembersih pendaftaran dari pautan ini .
2. Setelah dimuat turun, pasang dengan menggunakan tetapan yang disyorkan. Buka perisian setelah proses pemasangan selesai.
3. Pada antara muka, klik pada tab Registry yang terdapat di panel kiri dan klik butang yang dilabel sebagai Scan for Issues . Ia akan mula mencari kesalahan dalam pendaftaran dan apabila pencarian selesai, butang Perbaiki Masalah Terpilih akan diaktifkan. Klik pada butang itu dan semuanya akan diperbaiki.

Kaedah # 3: Memperbaiki Pemacu yang rosak
Pemacu adalah program perisian yang membantu komputer untuk berkomunikasi dengan perkakasan yang melekat padanya. Oleh itu, apabila ia rosak, perkakasan cenderung menyebabkan gangguan . Memperbaiki penyelam yang salah ini dapat membantu anda dalam beberapa cara. Ikuti langkah di bawah.
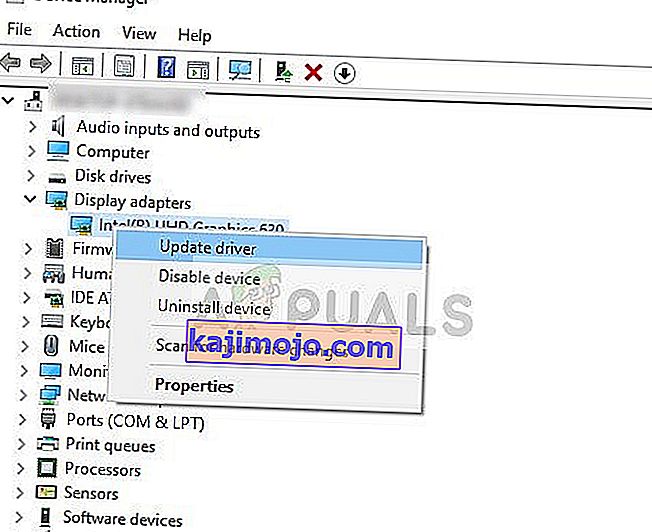
1. Buka Pengurus Peranti dengan menekan Win + X dan memilihnya dari senarai.
2. Di dalam Pengurus Peranti, tatal ke bawah untuk melihat apakah ada perkakasan dengan tanda kuning. Sekiranya ada, klik kanan di sana dan pilih Kemas kini Perisian Pemacu . Sekiranya anda telah memasang pemacu baru-baru ini, pasang semula pemacu tersebut juga.

3. Pada tetingkap yang muncul setelahnya, klik Cari secara automatik untuk perisian pemacu yang dikemas kini untuk membiarkannya mencari dan memasang pemacu secara automatik. Sekiranya, jika anda telah memuat turun pemacu secara manual, klik pada pilihan di bawah untuk menyemak imbas dan memasangnya. Setelah proses selesai, periksa kesalahannya.

Kaedah # 4: Betulkan BCD
Kaedah ini dilakukan oleh pengguna dengan risiko mereka sendiri. Ini berfungsi untuk sesetengah orang dan tidak untuk sesetengah orang. Anda juga perlu mengaktifkan semula Windows setelah melakukan langkah-langkah dalam panduan ini.
- Pegang Windows Key dan Akhbar X . Pilih Prompt Perintah (Pentadbir)
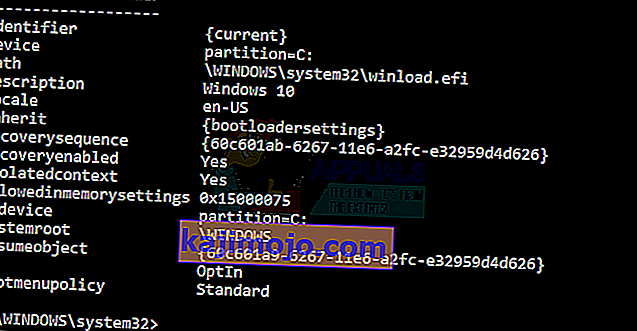
- Ketik " bcdedit" dan tekan ENTER. Sekiranya Laluan Pemuat Boot Windows anda adalah xOsload.exe maka anda perlu membuang beberapa fail dan membaiki BCD anda. Anda dapat melihatnya di medan PATH setelah anda melaksanakan perintah " bcdedit".
- Setelah selesai, laksanakan perintah berikut di bawah, beberapa mungkin kembali tidak dijumpai tetapi mengabaikan kesalahan dan teruskan sehingga yang terakhir. Pastikan, anda menekan butang ENTER selepas setiap arahan.

Del D: \ Windows \ System32 \ xOsload.exe Del D: \ Windows \ System32 \ xNtKrnl.exe Del D: \ Windows \ System32 \ Drivers \ oem-drv64.sys attrib c: \ boot \ bcd -h -r -s ren c: \ boot \ bcd bcd.old bootrec / rebuildbcd
Kaedah 5: Memeriksa Kemas Kini Windows
Kemas kini Windows sering mengandungi pembetulan untuk beberapa bug dan gangguan tetapi mereka juga terkenal kerana memberi laluan kepada masalah baru di komputer orang. Namun, dalam langkah ini, kami akan memeriksa sebarang kemas kini untuk sistem Operasi anda kerana Microsoft sering menyelesaikan masalah yang timbul dari kemas kini mereka. Untuk melakukannya, ikuti panduan di bawah.
- Tekan "Windows" + "I" untuk membuka tetapan Windows.
- Dalam pengaturan, klik pada pilihan "Pembaruan dan Keselamatan" dan dari sebelah kiri, pilih pilihan "Kemas kini Windows" .

- Pada layar berikutnya, klik pada pilihan "Periksa Pembaruan" dan secara automatik akan meminta Windows untuk memeriksa pembaruan yang tersedia.
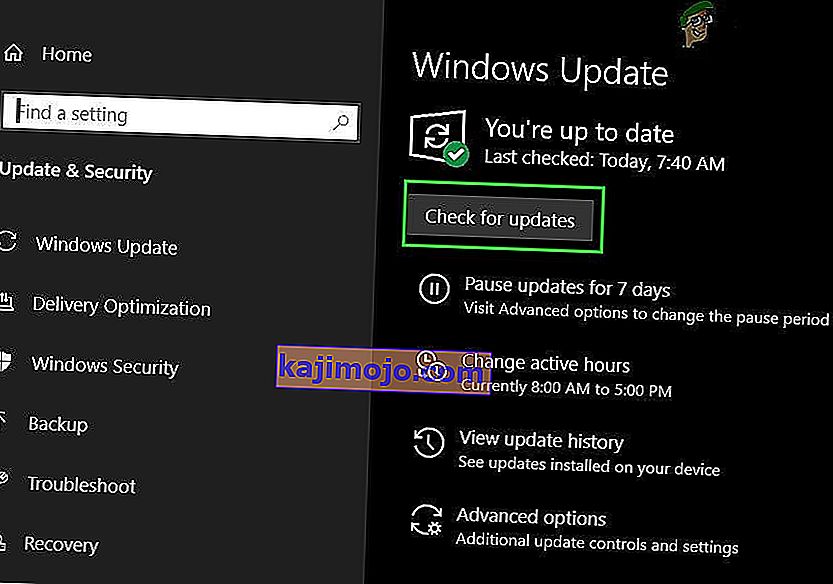
- Setelah pemeriksaan kemas kini selesai, klik pada butang "Muat turun" untuk mencetuskan muat turun dan pemasangan kemas kini baru di komputer anda.
- Setelah kemas kini ini dipasang, periksa untuk mengetahui apakah tindakan tersebut telah menyelesaikan masalah di komputer anda.


Kaedah 6: Memulihkan Komputer
Sekiranya anda baru mula mendapat masalah ini, masalah ini mungkin disebabkan oleh pemasangan pemandu yang salah atau bahkan disebabkan oleh aplikasi penyangak yang mungkin anda pasang di komputer baru-baru ini. Oleh itu, dalam langkah ini, kita akan mengembalikan keadaan komputer ke tarikh yang lebih awal dan semoga masalah ini dapat diselesaikan sekiranya ia disebabkan oleh alasan yang dinyatakan di atas. Untuk melakukan ini:
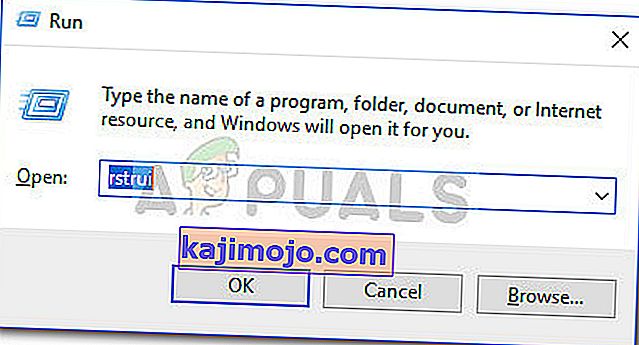
- Tekan "Windows" + "R" untuk membuka arahan Run.
- Ketik "rstrui" dan tekan "Enter" untuk membuka tetingkap pengurusan pemulihan.
- Klik "Next" dan periksa pilihan "Show more Restore Points" .
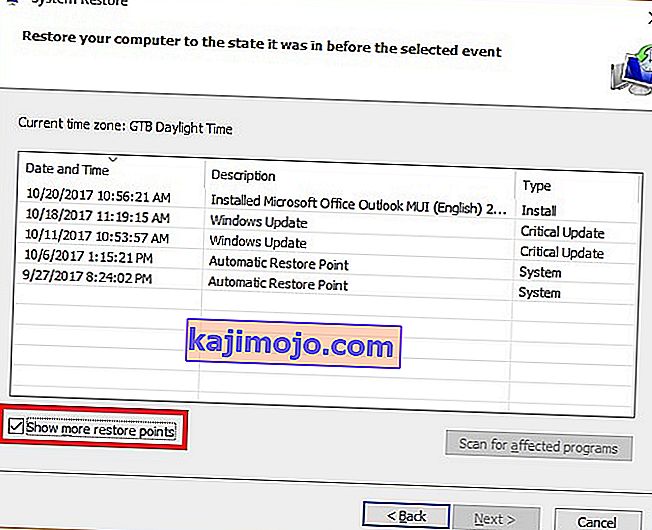
- Pilih titik pemulihan dari senarai sebelum tarikh masalah ini mula berlaku.
- Klik “Next” sekali lagi dan ikuti arahan di skrin untuk mengembalikan semuanya ke tarikh yang dipilih.
- Setelah pemulihan selesai, periksa untuk melihat apakah masalahnya masih berlanjutan.


Kaedah 7: Aktifkan Firewall
Ada kemungkinan dalam beberapa kes, kesalahan itu dicetuskan kerana aplikasi tersebut mencurigakan atau paling tidak jika aplikasi tersebut ditandakan sebagai mencurigakan dan Windows Firewall tidak berjalan di komputer anda untuk mengesahkan ini mencurigakan. Oleh itu, dalam langkah ini, kami akan memastikan bahawa Windows Firewall diaktifkan untuk menyingkirkan ralat ini. Untuk itu:
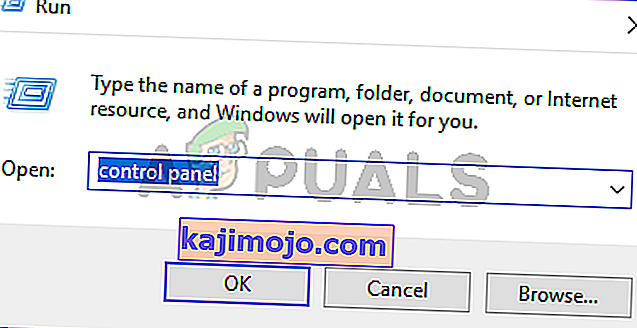
- Tekan "Windows" + "R" untuk membuka arahan Run.
- Ketik "Panel Kawalan" dan tekan "Enter" untuk melancarkan antara muka Panel Kawalan klasik.
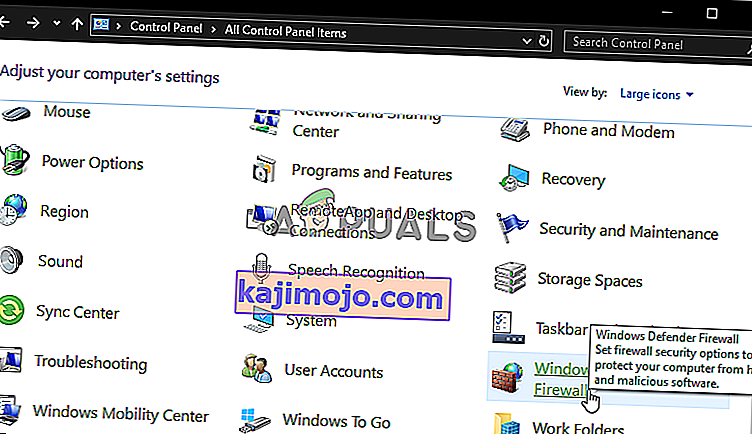
- Di Panel Kawalan, klik pada pilihan "Lihat Oleh:" dan pilih butang "Ikon Besar" .
- Setelah membuat pilihan ini, klik pada pilihan "Windows Defender Firewall" untuk melancarkan Firewall dan kemudian pilih "Hidupkan atau Matikan Windows Defender Firewall".
- Pastikan untuk memeriksa "Hidupkan Windows Defender Firewall" untuk kedua-dua pilihan yang tersedia untuk menghidupkan Firewall.
- Setelah membuat pilihan ini, simpan perubahan anda dan tutup dari Tetingkap.
- Setelah melakukannya, periksa untuk melihat apakah masalahnya masih berlanjutan.


Kaedah 8: Jalankan Imbasan SFC
Dalam beberapa keadaan, anda mungkin telah memasang pemacu yang tidak baik pada komputer anda atau pada suatu ketika, kerana kegagalan penyimpanan, beberapa fail sistem atau pemacu mungkin telah rosak. Oleh itu, dalam langkah ini, kami akan menjalankan imbasan sistem yang lengkap untuk mengenal pasti sebarang pemandu yang tidak mempunyai tandatangan atau untuk memperbaiki sebarang kelainan pada fail sistem. Untuk itu:
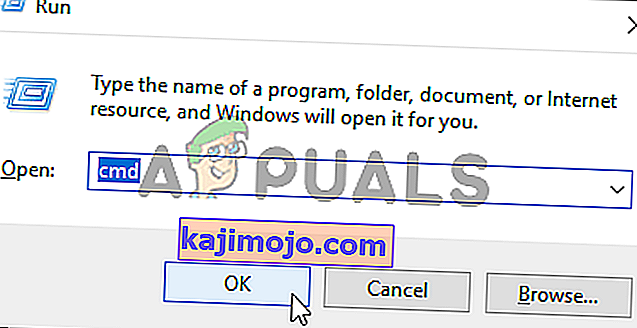
- Tekan "Windows ' + " R' untuk membuka arahan Run
- Ketik "cmd" dan kemudian tekan "Shift ' + " Ctrl " + " Enter " untuk memberikan izin pentadbir. Menjalankan Command Prompt
- Ketik perintah berikut di dalam command prompt dan tekan "Enter" untuk melaksanakannya.
sfc / scannow
- Biarkan komputer mengimbas barang yang rosak atau rosak dan ia akan menggantikannya secara automatik dengan barang yang berfungsi.
- Periksa untuk mengetahui apakah tindakan tersebut dapat memperbaiki mesej ralat.

Kaedah 9: Melumpuhkan Pencegahan Pelaksanaan Data
Pencegahan Pelaksanaan Data adalah program yang mencegah program atau eksekusi tertentu tidak dapat dijalankan di komputer anda kerana mengesyaki bahawa mereka mungkin virus. Oleh kerana pencegahan ini, kadang-kadang, sebagai penggera palsu, aplikasi legit juga mungkin menghadapi masalah ketika cuba dijalankan di komputer anda. Oleh itu, dalam langkah ini, kita akan mematikan tetapan ini dari panel konfigurasi sistem. Untuk itu:
- Tekan 'Windows' + "R ' untuk membuka arahan Run.
- Ketik "Panel Kawalan" dan tekan "Enter" untuk melancarkan antara muka panel kawalan klasik.

- Di dalam Panel Kawalan, klik pada ikon "Lihat Oleh:" dan kemudian pilih pilihan "Ikon Besar" .
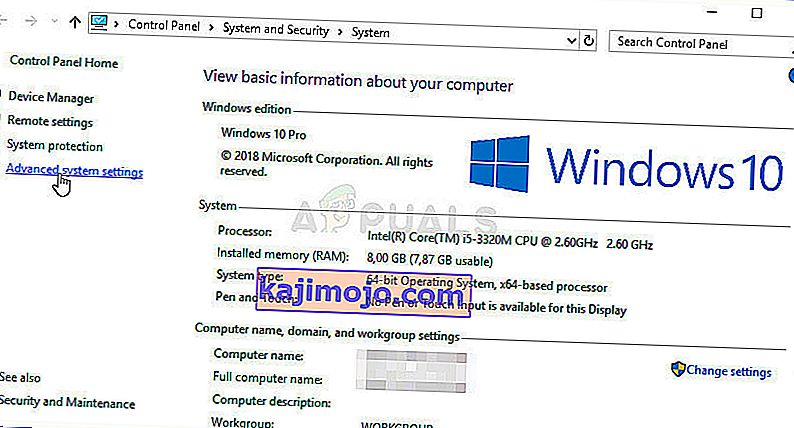
- Setelah memilih Ikon Besar, pilih pilihan "Sistem" .
- Klik pada pilihan "Tetapan Sistem Lanjutan" di sebelah kiri skrin.
- Dalam Tetapan Sistem lanjutan, klik pada tab "Lanjutan" dari atas.
- Pada tab lanjutan, klik pada pilihan "Tetapan" di bawah tajuk "Prestasi" .
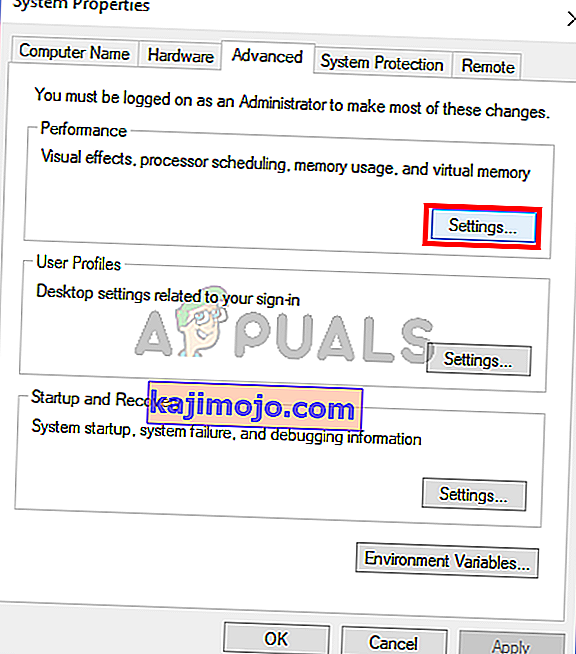
- On the next window that opens up, click on the “Data Execution Prevention” tab, and then select the “Turnon DEP for all programs except thoseI Select” option.
- After that, click on the “Add” option and point to the executable of the application that you are facing issues with.
- This way, that application will no longer come under the jurisdiction of the DEP program.
- Check to see if doing so has fixed the issue.


If the above process is unable to fix the issue, it might be because the executable isn’t the only one being affected by the DEP program. Sometimes the DEP might actually be preventing a herd of executables from being run on the computer and to counter this we will be disabling DEP completely.
Disabling DEP completely cannot be done through any Windows setting and it needs to be done manually through the command prompt. Remember to take this step as a last resort because this can in some cases makes your computer more vulnerable to viruses and malware attacks. In order to disable DEP through the command prompt:
- Press “Windows” + “R’ to open the Run prompt.
- Inside the Run prompt, type in “cmd” and then press “Shift” + “Ctrl” + “Enter” to launch in admin mode.
- Inside the command prompt, type in the following command and press “Enter” to execute it on your computer.
bcdedit.exe /set {current} nx AlwaysOff - Once the command has been executed, run the application that you want to and check to see if the error message still persists.
Method 10: Disable Firewall and Windows Defender
In some situations, the executable that you want to run on the computer might actually be blocked by the Firewall and it would not be able to make contact with its servers this way. Therefore, we will have to allow the executable in our Firewall for both public and private networks which should get it working if the Firewall is preventing it.
In addition to that, sometimes the Windows Defender might prevent the application from running on your computer because its local files might be suspicious and not properly signed. This can be due to a false alarm as well so we will be disabling the Windows Defender for the application as well by adding an exclusion. In order to do that:
- Press “Windows” + “R” to launch the Run prompt.
- Type in “ControlPanel” and press “Enter” to launch the classical control panel interface.
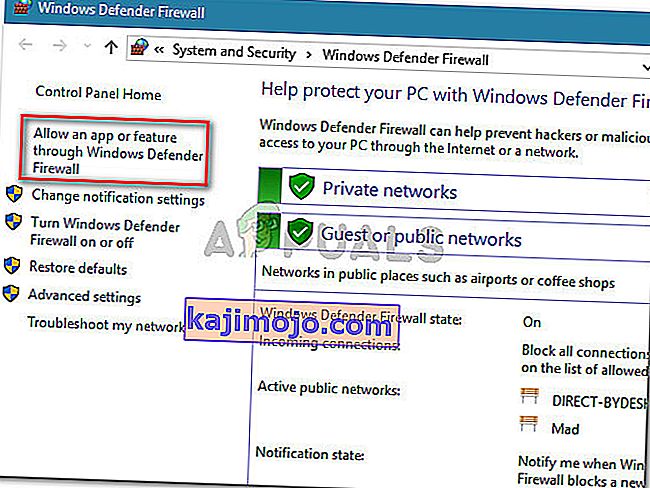
- Click on the “View by:” button, select “Large Icons” and then click on the Windows Defender Firewall option.
- Select the “Allow an app orfeature through the Firewall” button on the left pane and then click on the “Change Settings” button and accept the prompt.
- From here, make sure that you check both the “Public” and the “Private” options for the application and its entries.
- Save your changes and exit out of the window.
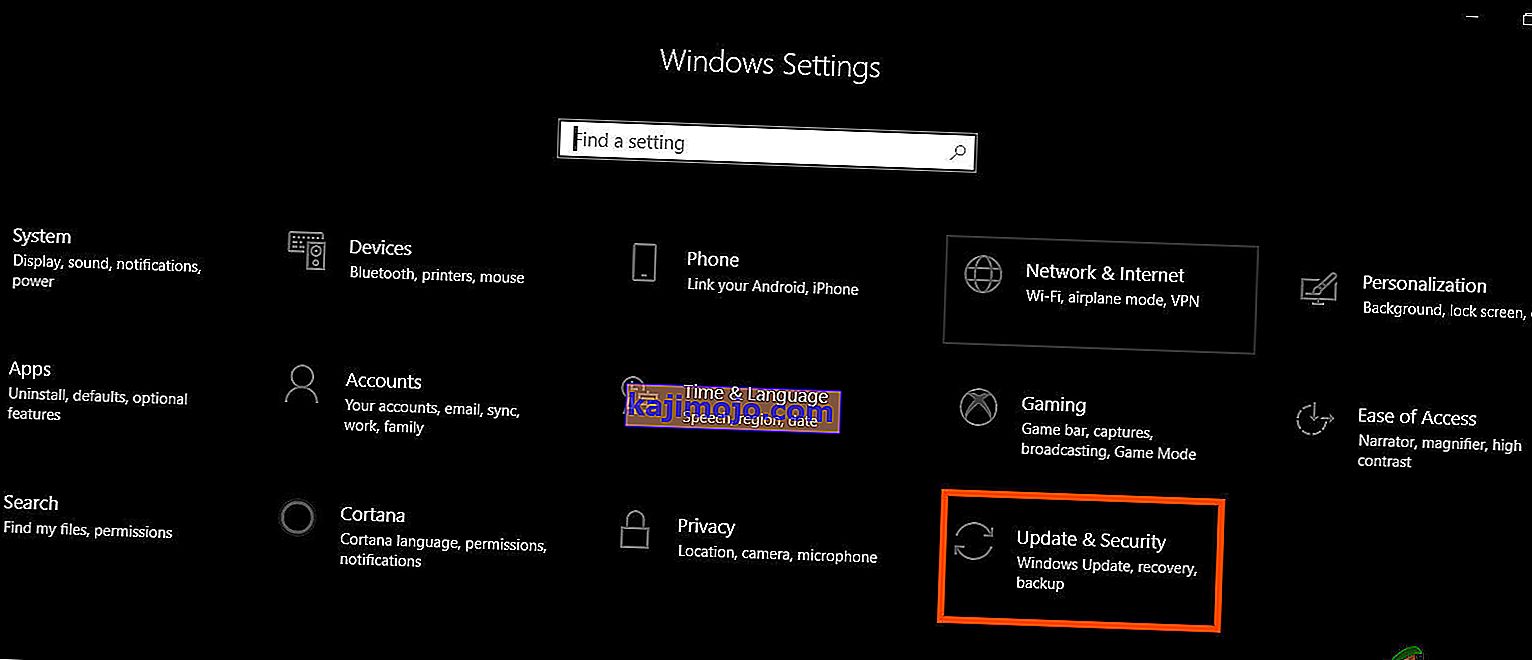
- After that, press “Windows” + “I” to launch the settings and click on the “Updateand Security” option.
- From the left pane, click on the “Windows Security” button and then click on the “Virus and Threat Protection” button.
- Select the “Manage Settings” button under the Virus and Threat Protection Settings heading.
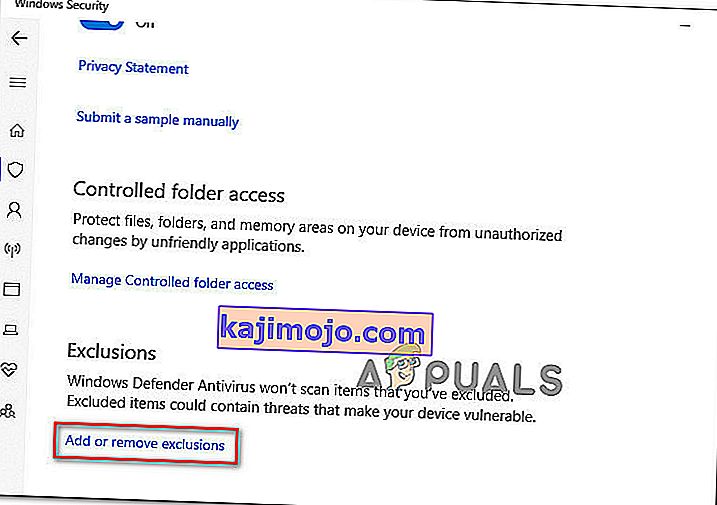
- Scroll down and click on the “Add or Remove Exclusions” button in the next window.
- Click on the “Add an Exclusion” option and select “Folder’ from the File type.
- Make sure to specify the application’s folder with which the issue is occurring and exit out of this window after saving your changes
- Check and see if doing so has fixed the error message.


Method 11: Reinstall Firefox
If you are getting this error while trying to launch Firefox, it might be occurring because the applications haven’t been installed properly on your computer. Therefore, in this step, we will be launching the app management window and uninstalling Firefox after which we will reinstall it completely by downloading it from the Firefox website. For that:
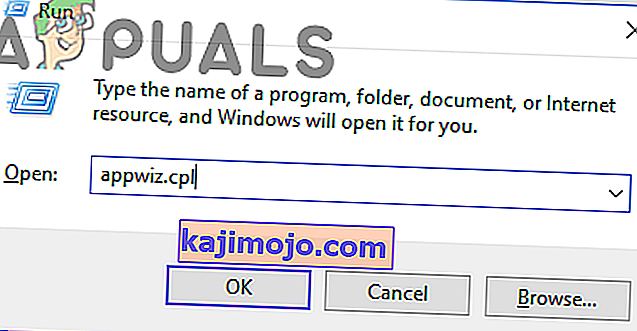
- Press “Windows” + “R” to open the Run prompt.
- Type in “appwiz.cpl” and press “Enter” to open the app management window.
- In the app management window, scroll down and right-click on the “Firefox” application.
- Select “Uninstall” from the list and then follow the on-screen instructions to remove the software from your computer.
- Repeat this step for all instances and bundled applications of the software installed on your computer.
- Make sure to disable any third-party antiviruses at this point to make sure that the software is installed smoothly.
- Head on over to the Mozilla website and click on the download button.

- Click on the downloaded executable and install it on your computer following the on-screen instructions.
- Check to see if doing so has fixed the error message on your computer.


Method 12: Scanning for Malware
It is possible in some cases that the computer has acquired malware that is preventing the user from being able to run all the system functions on their computer. Therefore, in this step, we will be using the default Windows Defender to scan our computer thoroughly for any viruses or malware that might’ve found its way on our computer. For that:
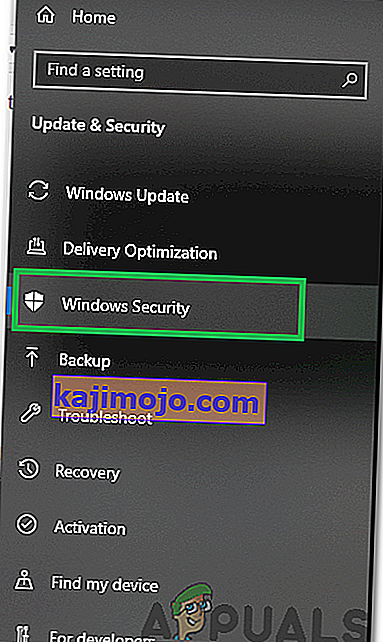
- Press the “Windows” + “I” keys simultaneously on your PC to open the Settings tab.
- Navigate to the Update& Security option and then click on the “Windows Security” button on the left tab.
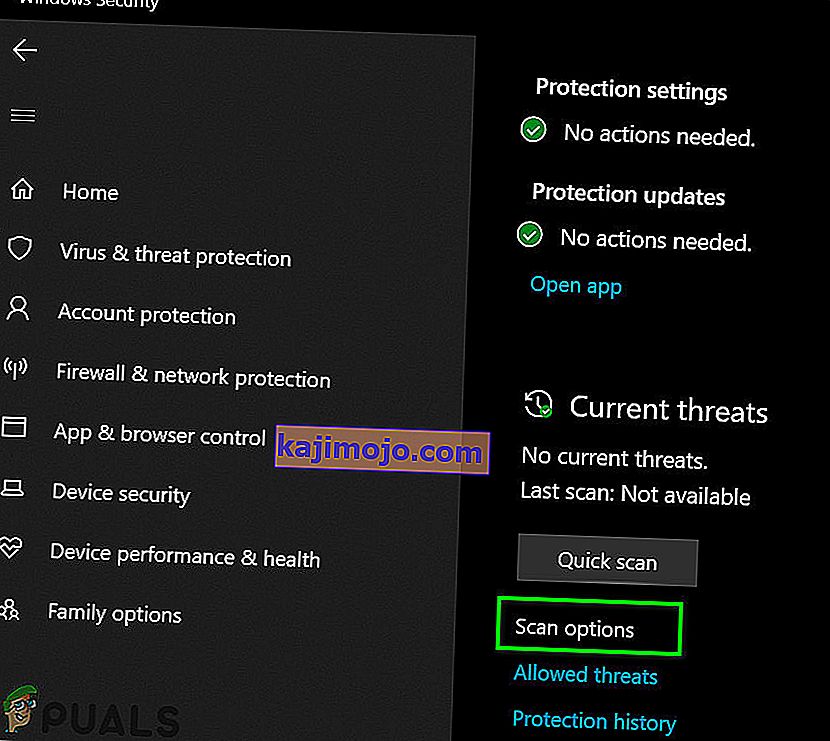
- After that, click on the “Open Windows Security” and select the “Virus and Threat Protection” option.
- After that, click on the “Scan Options” button below the “Quick Scan” window.
- Click on the “Full Scan” option and then hit the button of “Scan Now”.
- Wait for a few seconds while this process gets completed and then finally check if the error gets resolved now.


Microsoft Security Scanner is an additional tool that you can use to test the system for any further viruses and malware because sometimes the default tool isn’t able to perform the scan properly. Therefore, in this step, if the issue still hasn’t been resolved, we will be using the Microsoft Security Scanner to further make sure for any issues.
- Launch your browser and download the Microsoft Security Scanner from here.
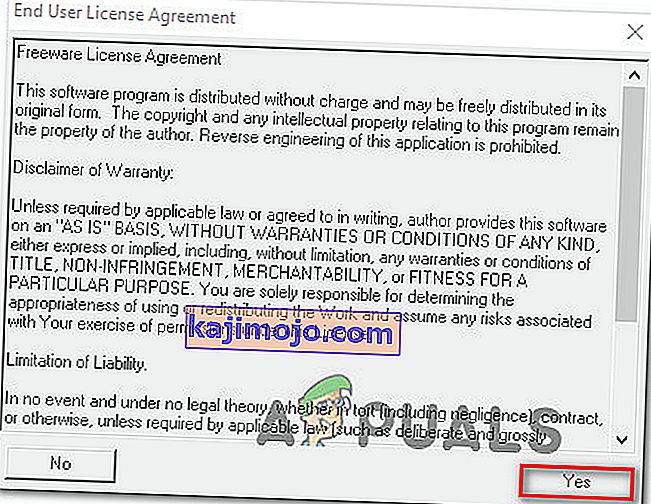
- After downloading the executable, run it on your computer and let it install.
- Accept the License Agreement terms and click on “Next”.
- Select “Full Scan” and click on “Next”.
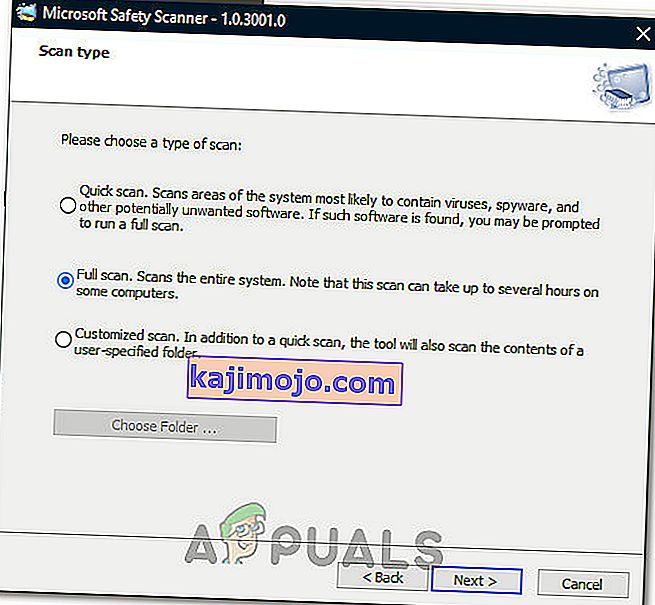
- After you opt for a full scan, the software will start scanning your entire computer to look for any malware or viruses that might’ve disguised themselves as normal executables or applications.
- After this scan has been finished, check to see if the error message still persists.


Method 13: Install Missing Drivers
It is possible in some situations that your device is missing certain drivers due to which this particular issue is being triggered on your computer. Therefore, we will be checking for any missing drivers and then we will check to see if the error is fixed. In order to do this, follow the guide below.
- Download Driver Easy on your computer.

- Run the downloaded executable and install the software on your computer.
- Run the check and see if there are any missing drivers on your computer.
- Install these missing drivers and then install them either manually or automatically using the Software.
- After installing all the missing drivers, check to see if the issue still persists.

Method 14: Reconfigure Registry
It is possible that in some cases, you haven’t properly configured all the registry settings or that you unknowingly configured something incorrectly. Therefore, in this step, we will be reconfiguring our Registry to fix a certain key that sometimes, if misconfigured, causes this particular error on Windows. In order to do this, follow the guide below.
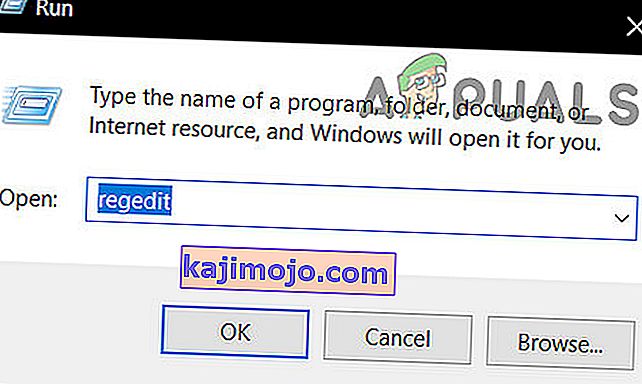
- Press “Windows” + “R” to open the Run prompt.
- Type in “regedit” and press “enter” to launch the registry editor.
- Inside the registry editor, navigate to the following location.
HKLM\SOFTWARE\Microsoft\Windows NT\CurrentVersion\Windows\AppInit_Dlls
- Double click on the “LoadAppInit_DLLs” entry on the right side of the screen.
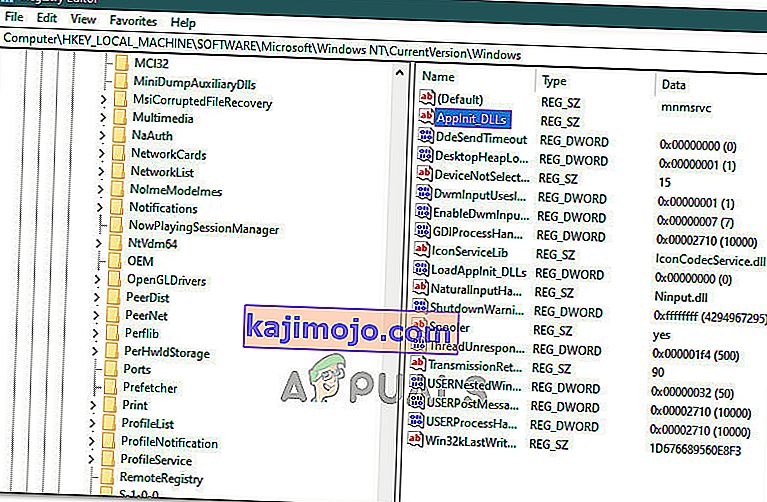
- Change the value of this registry from “1” to “0”.
- Save your changes and exit the registry editor.
- Check to see if doing so has fixed the error.


Method 15: Update Disk Drivers
In some cases, the Disk Drivers that are being used to control your Storage and other Disks installed on the computer might have been outdated due to which the error is being triggered. Therefore, in this step, we will first be opening the Device Management Window and from there, we will be updating these drivers. In order to do so, follow the steps mentioned below.
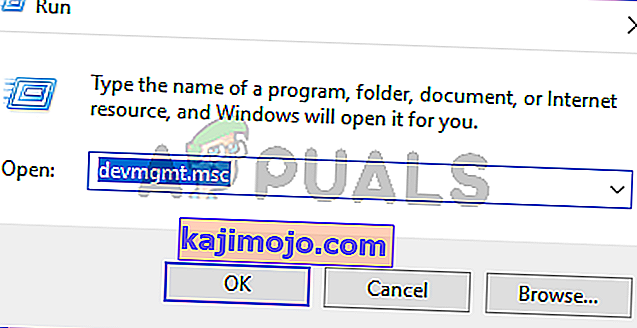
- Press “Windows’ + “R” to open the Run prompt.
- Type in “Devmgmt.msc” and press “Enter” to launch the device management window.
- In the Device Manager, double click on the “DiskDrives” option to expand it.
- Right-click on the storage device listed and select the “Update Driver” option.
- Select the “Search Automatically for Drivers” option and let the setup search.
- If there are any drivers available, Windows will automatically check for them and install them on your computer.
- Check to see if doing so has fixed the issue.


Method 16: Disabling Automatic Updates and Uninstalling Updates
It is possible in some cases, that this error is stemming from a faulty update install. Microsoft is notorious for pushing out updates that aren’t properly customized to work for all hardware combinations and often go on to break things instead of making them better. Therefore we will make sure that the recent update isn’t installed on our computer.
In order to do this, we will have to first disable automatic updates on our computer and then we will be uninstalling the recently installed updates. Make sure to back up any important data that you don’t want to lose just in case this goes bad.
- Press “Windows” + “R’ to open the Run prompt.
- Type in “service.msc” and press “Enter”.
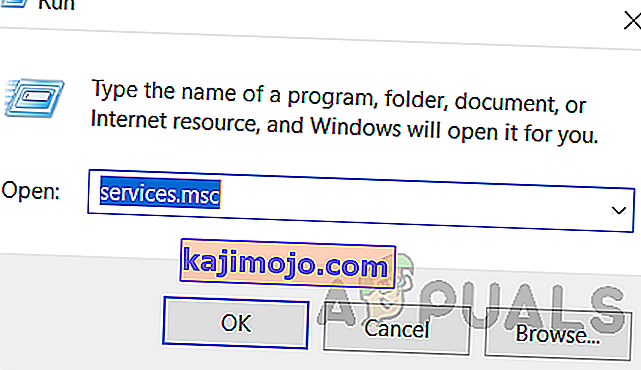
- Scroll through the list and double click on the “Windows Update” service.
- Click on the “Stop” button and then click on the “Startup Type” dropdown.
- Select “Disabled” from the list and select the “Apply” button from the window.
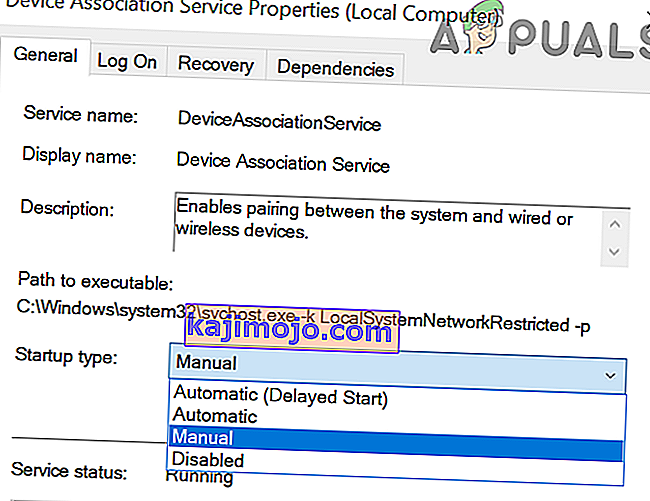
- Click on “OK” to close out of this window.
- Check to see if doing so has stopped your computer from updating.


After stopping the computer from updating, we will now be uninstalling the recent updates that have been installed on your computer. For that:
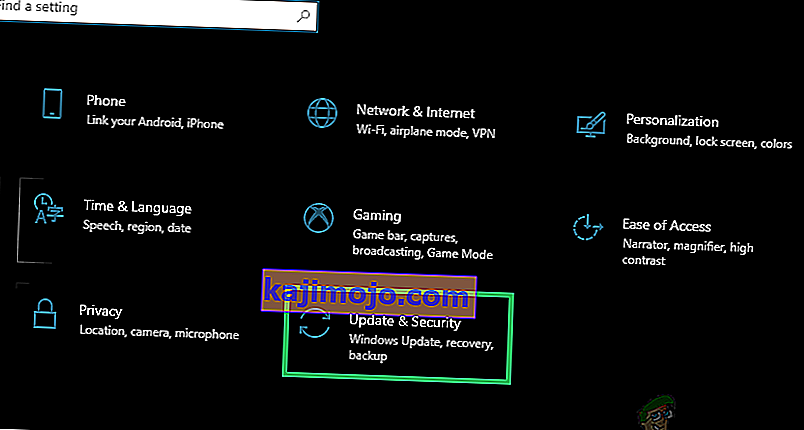
- Press “Windows” + “I” buttons to open the settings.
- In settings, click on the “Update and Security” option and then select the “Windows Update” button from the left pane.
- In the Windows Update, click on the “View Update History” option.
- In the Update History, click on the “Uninstall Updates” option and it should take you to the uninstallation screen where all the recently installed updates will be listed.
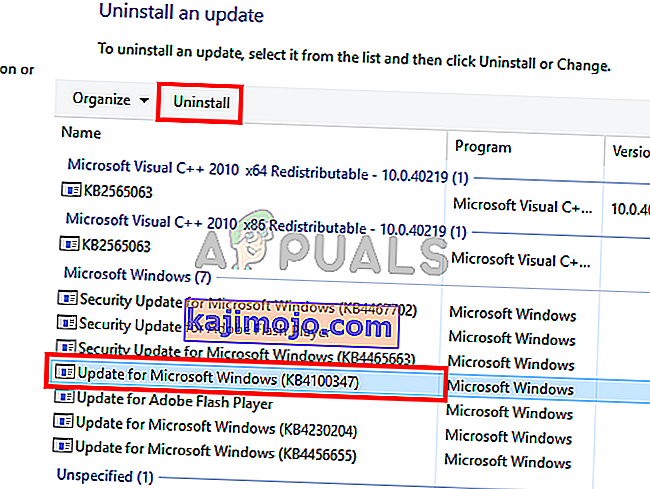
- From the list, right-click on the update that was installed recently and caused this error on your computer.
- Right-click on this update and select the “Uninstall” button to remove it completely from the computer.
- Follow through with the on-screen instructions.
- Check to see if uninstalling has fixed this issue.


Additional Fixes:
- In addition to some of the recommendations given above, you should try to check if there are any bad memory modules (RAM) installed on your computer which can be a cause of this.
- Juga, pastikan untuk memeriksa sama ada anda belum melakukan overclock RAM ke tahap yang melebihi had yang disyorkan. Sekiranya anda melakukannya, cubalah mengembalikannya ke lalai kilang dan periksa sama ada ia menyelesaikan masalah anda ..